You can customize Flexia theme blog settings easily and give them an outstanding appearance for your WordPress website. Flexia offers all stunning features for blogs, that you can easily configure all without any coding.
How To Configure Flexia Theme Blog Settings? #
If you want to configure Flexia theme blog settings, then follow this step-by-step guideline:
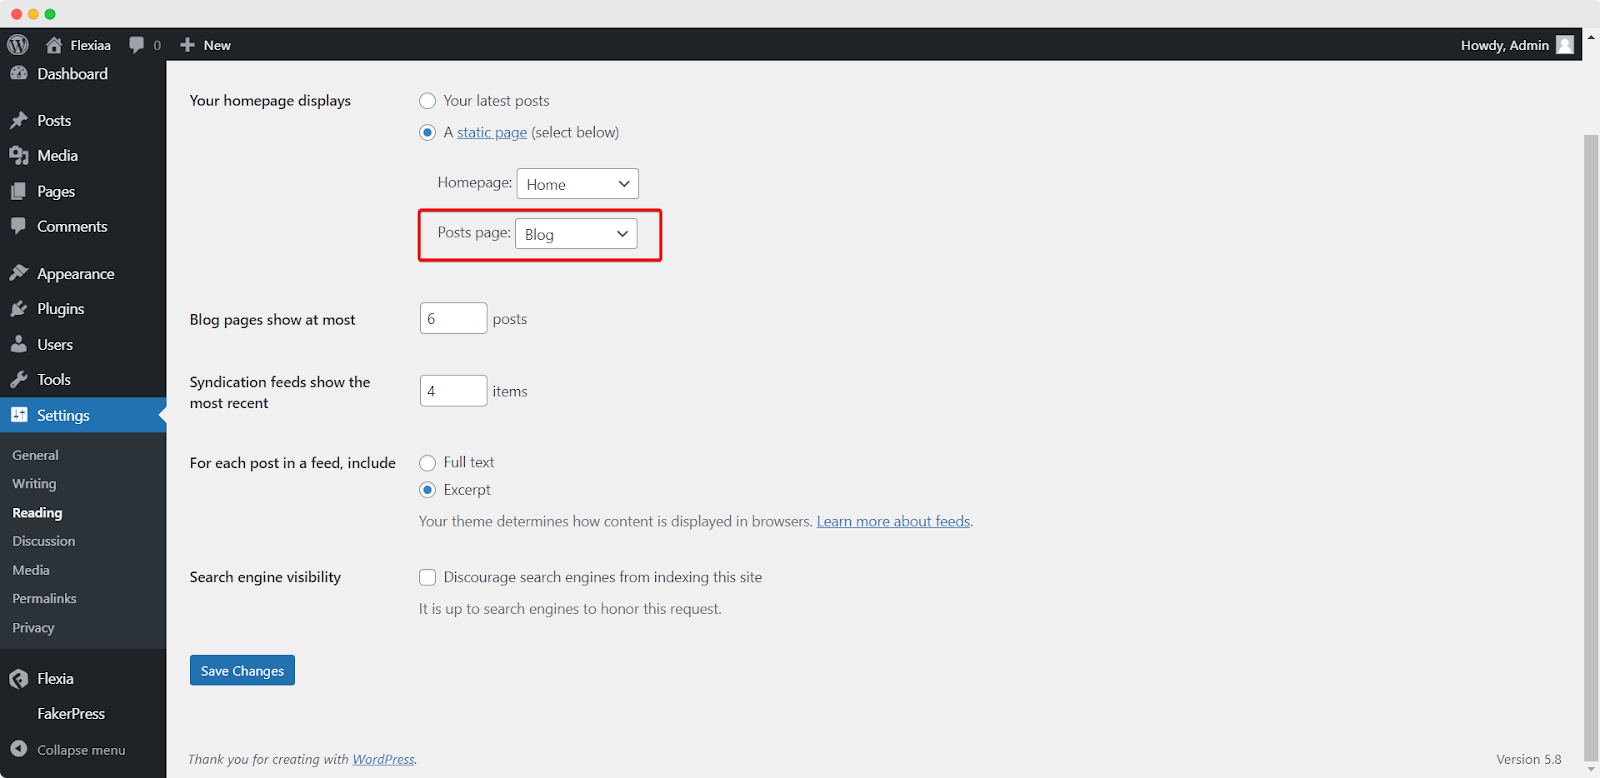
Step 1: Configure Blog Page From Dashboard #
To configure your WordPress website blog settings, first, you have to create a blog page and set it as the static page that will be displayed as your homepage. Go to ‘Pages’ and create a page named ‘Blog’. Now go to Settings → Reading, and set ‘Posts page’ type as ‘Blog’. This will set your posts page as your blog page. Next, add this blog page on your website menu following this guide here.
Step 2: Configure Blog Header Settings #
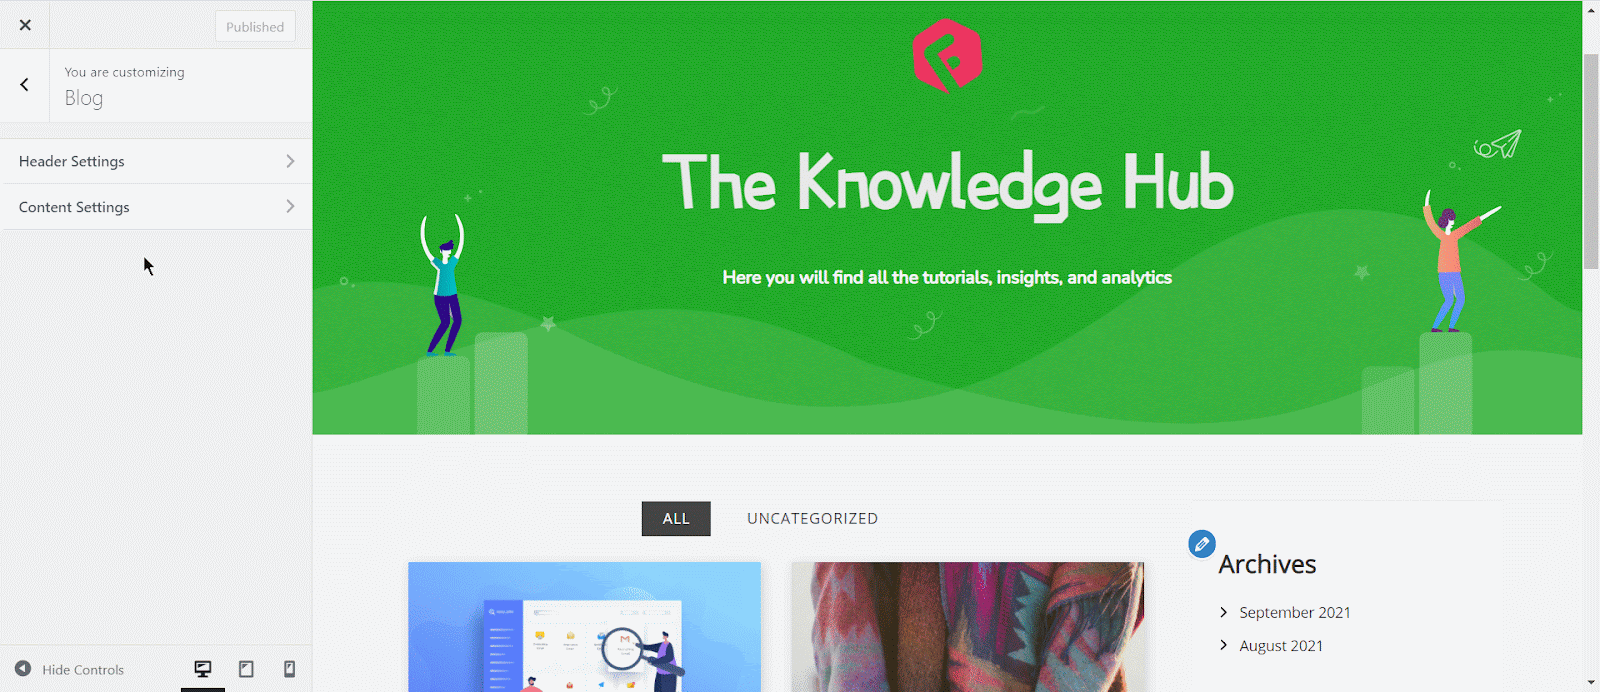
Go to Appearance → Customize to configure blog settings. If you want to customize blog header settings, then go to Blog Styles → Blog → Header Settings. There you will find all the options to customize your blog header.
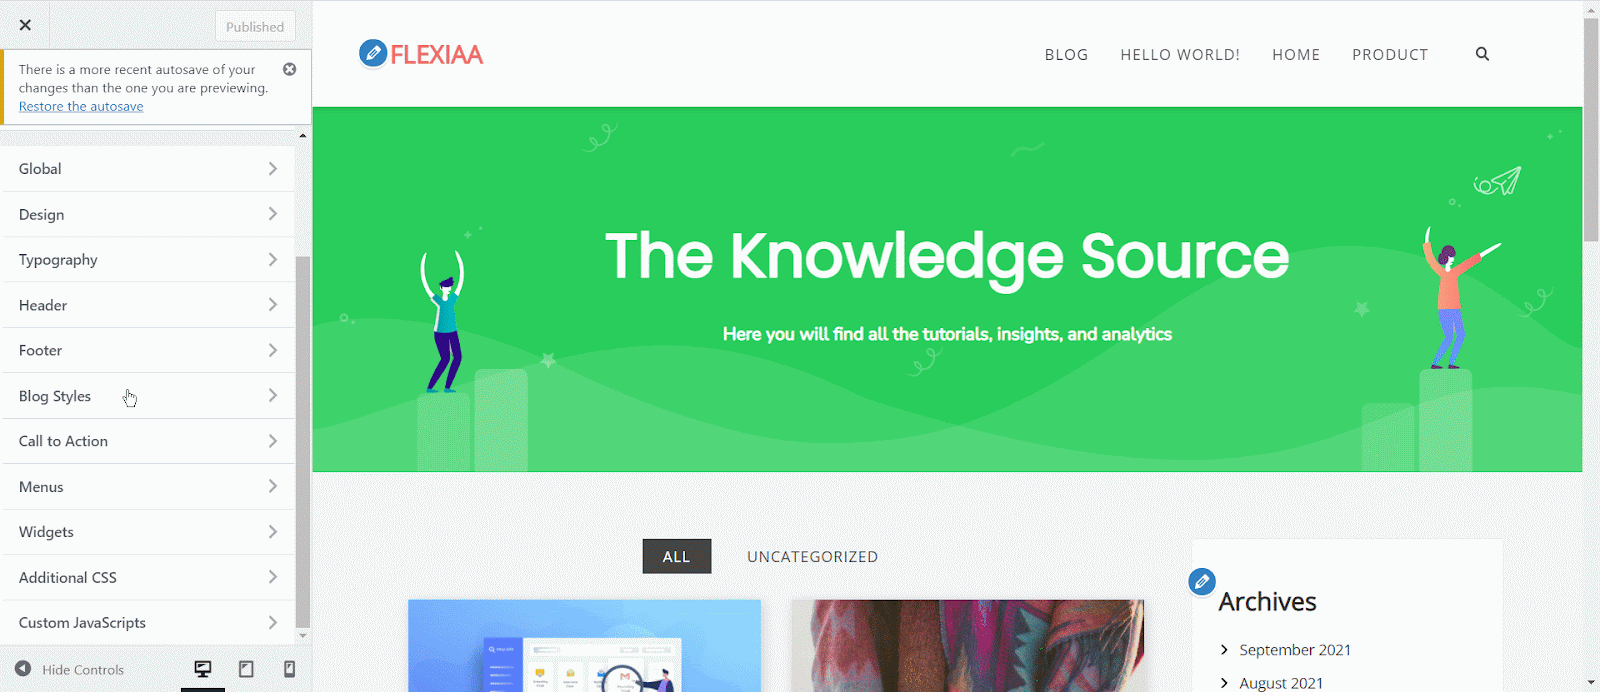
Flexia Theme offers built-in blog page header layouts. You can disable it by toggling from ‘Show Blog Header?’ section. If you keep the blog header, then you can easily customize it in your own way. To change the color of the blog header, click on the ‘Select Color’ button under the ‘Blog Header Background Color’ section, and choose your preferred one.

To add a logo or icon on your blog page, then select ‘Image’ from the drop-down of ‘Blog Logo / Icon’ section. Then upload your preferred image. You can adjust the logo size by pixel from the ‘Blog Logo width’ section.

Under the ‘Blog Title’ section, give a stunning title for your blog page. You can customize the title from the ‘Blog Title Font Size (px)’ section. Select preferred color for the title from the ‘Blog Title Font Color’ section. Click on the ‘Select Color’ button to pick a color.
Furthermore, you can change the Blog Title Font Family. Currently, there are more than 500 fonts available. Choose one that fits your blog page.

In the same way as the blog title, you can customize the blog description of the blog header also. You can change the description content from the ‘Blog Description’ section. Then, adjust the Blog Description Font Size (px), select a suitable Blog Description Font Color, and pick the Blog Description Font Family.

After making changes, click on the ‘Publish’ button. Your blog settings for header will be updated.
Step 3: Configure Blog Content Settings #
To configure blog content settings, go to Appearance → Customize → Blog Styles → Blog → Content settings. There you will find all the options to customize blogs’ appearance on the web page.
From the Content Display section, you can set who to display each blog card. To preview the full content of the blog, select the ‘Show Full Post Content’ option, and select the ‘ Show Excerpt only’ option to preview only the excerpt sections of the blog. Furthermore, add the number of words you want to display from the ‘Excerpt Count (words)’ field.

Layout Settings #
Flexia theme offers a unique content layout preset along with other available WordPress presets. Select the content layout settings from Standard Layout, Flexia Layout, and Masonry Layout.

Input the number of blogs you want to display in Posts Per Page; section. After that, set the column number from the Posts Per Page section. Furthermore, you can hide meta descriptions or add them. From the drop-down, select header or Footer as meta. If you want to display ‘Popup Featured Image’, then toggle it to enable it.

Post Card Styling #
From this section, you can style every individual Flexia theme blog settings. You can customize Post Card Background, Post Card Box-Shadow Color from here. Moreover, there are options to customize your Post Card Border Radius, Post Title Font Size, Post Excerpt Font Size, Post Title Color, Post Excerpt Color, Post Author Color, Post Meta Color, and so on from the same section.

Category Filter Options #
From the Category Filter Options, you can enable or disable displaying categories from your blog page. If you enable to display of blog categories, then other additional customizations options will be available for you. You can set the category tags from the ‘Select Categories’ option, change Filter Button Font Size, Filter Button Font Color, and many more. You can also customize the Filter Button Active Background, and Filter Button Active Font Color from this section as well.

Load More Options #
This is where you can enable the ‘Read More’ button for your blog posts. After enabling the option, you will get the chance to customize the button content, font size, color, layouts, etc. To change button text add content on the ‘Load More Text’ field, change loading section content from ‘Loading’ field, change the color of the Load More Button Background, Load More Hover Button Background, Load More Hover Button Text Color, and so on.

After making changes, click on the ‘Publish’ button. Your Flexia theme blog settings for content will be updated successfully.
Step 4: Configure Single Post Settings #
To configure single blog settings, then go to Appearance → Customize → Blog Styles → Single Post → Single Posts Settings.
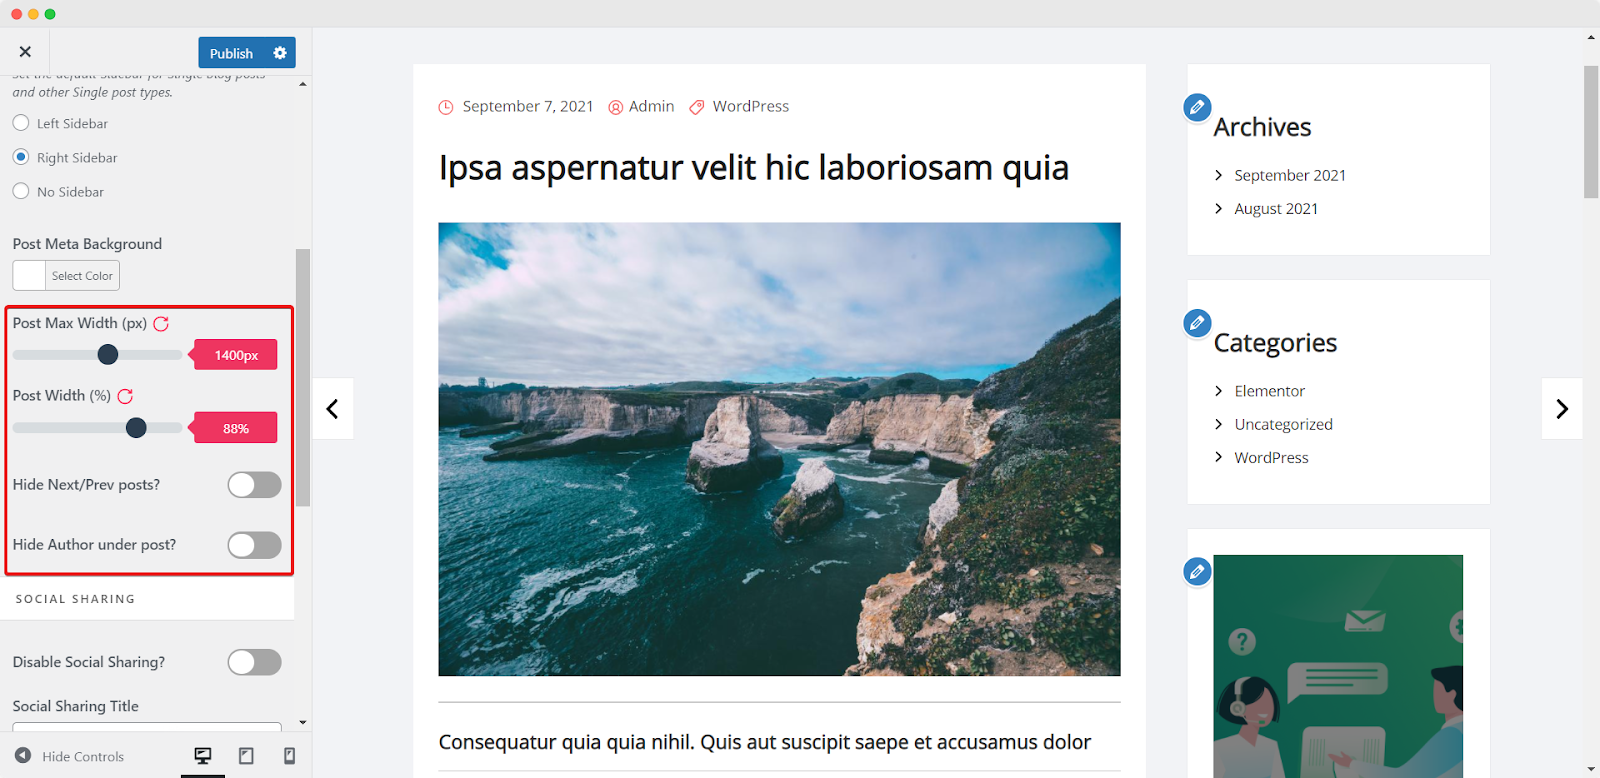
There you will find all the options to customize single post’s appearance. For Post Header Layout styling, 4 options are available: Large Header, Simple Header, Simple Header No Container, and No Header. Choose your preferable one from here. From the Post Sidebar section, you can add a left or right sidebar to this page. Also, change Post Meta Background color from this section.

Furthermore, you can adjust the width of the blog section from Post Max Width & Post Width. You can enable the preview of the next or previous post by toggling ‘Hide Next/Prev posts?’ section. And enable or disable author introduction from ‘Hide Author under post?‘ Section.
Social Sharing: #
In Flexia theme, there is the privilege to integrate social media platforms so that readers can share the blogs to their preferred social media platforms in one click. At present, there are 8 social media platform integrations available in Flexia themes: Facebook, Instagram, LinkedIn, Pinterest, Gmail, Tumbler, Reddit, and Blogger.
Toggle to enable direct sharing to social media from ‘Disable Social Sharing?’ option. Modify the preview text from the ‘Social Sharing Title’ option. By toggling, keep your preferred social media platforms of yours.

After making changes, click on the ‘Publish’ button. Your blog settings for a single post will be updated successfully.
Step 5: Configure Header Image Settings #
To configure single blog settings, then go to Appearance → Customize → Blog Styles → Header Image. From there you can easily customize the blog page header from here.
Flexia theme provides a built-in blog header image. You can also update a new one as well as randomize uploaded headers.

After making changes, click on the ‘Publish’ button. Your blog settings for header will be updated successfully.
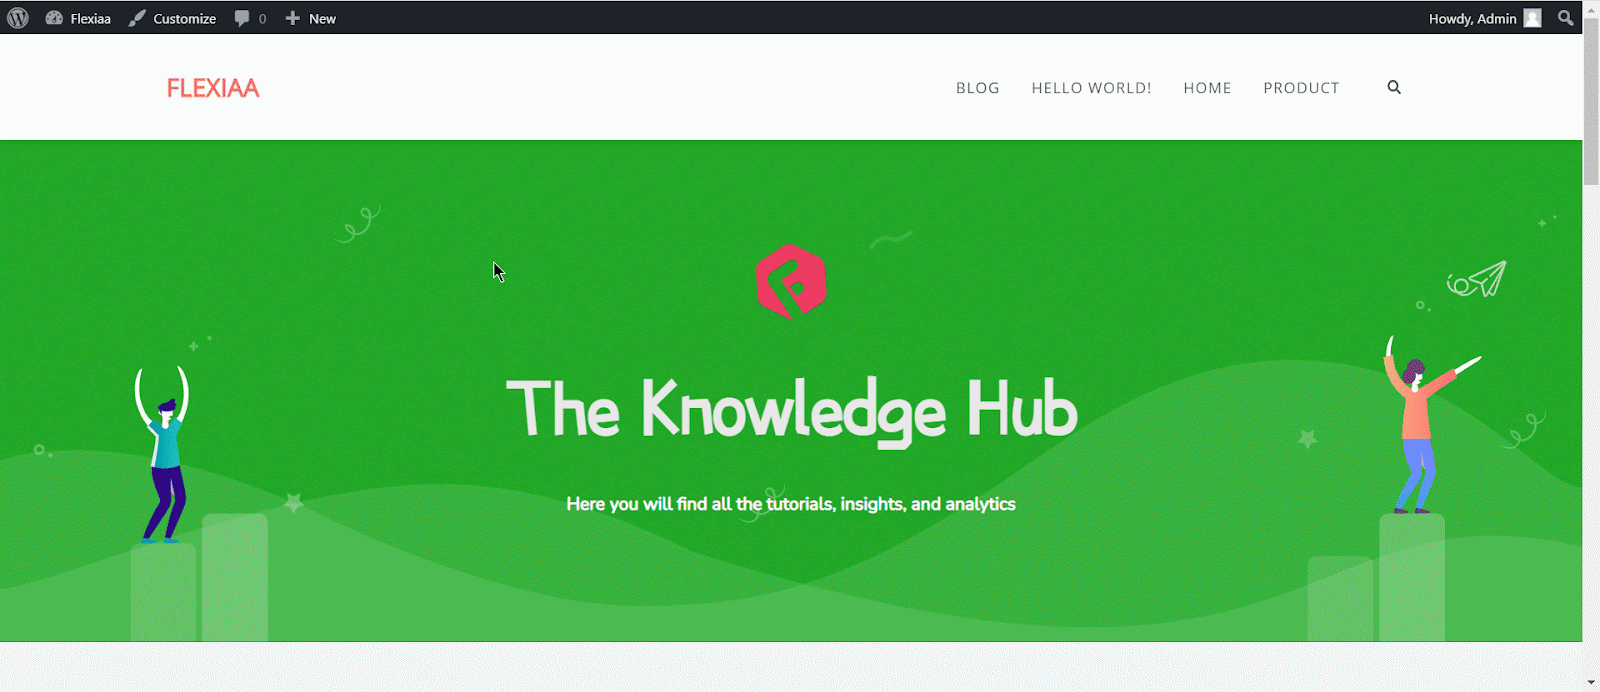
Final Outcome #
Click on the ‘Publish’ button after configuring the blog settings. This is how your blog page will look like.
This is how easily you configure Flexia theme blog settings in your WordPress website.
Get stuck? Feel free to contact our dedicated support team.


